Hapi Remote Control Configuration Guide
Remotely control your AI coding assistant from anywhere, anytime
Author: weishuOfficial docs: https://hapi.run/
📋 Overview
Hapi is a local-first application that lets you run Claude Code / Codex / Gemini sessions locally and remote-control them through the Web, PWA, or a Telegram Mini App. That means you can monitor and manage your AI coding tasks from your phone or browser.
🔗 Related Links
| Resource | URL |
|---|---|
| Hapi website | https://hapi.run/ |
| Hapi repository | https://github.com/tiann/hapi |
| Quick start | Official Quick Start docs |
| Cloudflare Tunnel docs | Create a remote tunnel |
✨ Core Features
Hapi delivers a powerful feature set:
- ✅ Seamless switching: Move freely between local-native mode and remote control
- ✅ Remote sessions: Start sessions from any device
- ✅ Mobile monitoring: Track and manage tasks from your phone or browser
- ✅ Permission control: Approve or deny tool permissions remotely
- ✅ File browsing: Browse files and review git diffs
- ✅ Progress tracking: Follow progress through to-do lists
- ✅ Multi-backend support: Works with Claude Code, Codex, and Gemini
🛠️ Installation
Step 1: Install Hapi
💡 Prerequisites
Make sure Node.js 18+ is installed. If you need to install it, see Node.js environment setup.
Visit the Hapi Quick Start docs for detailed installation instructions.
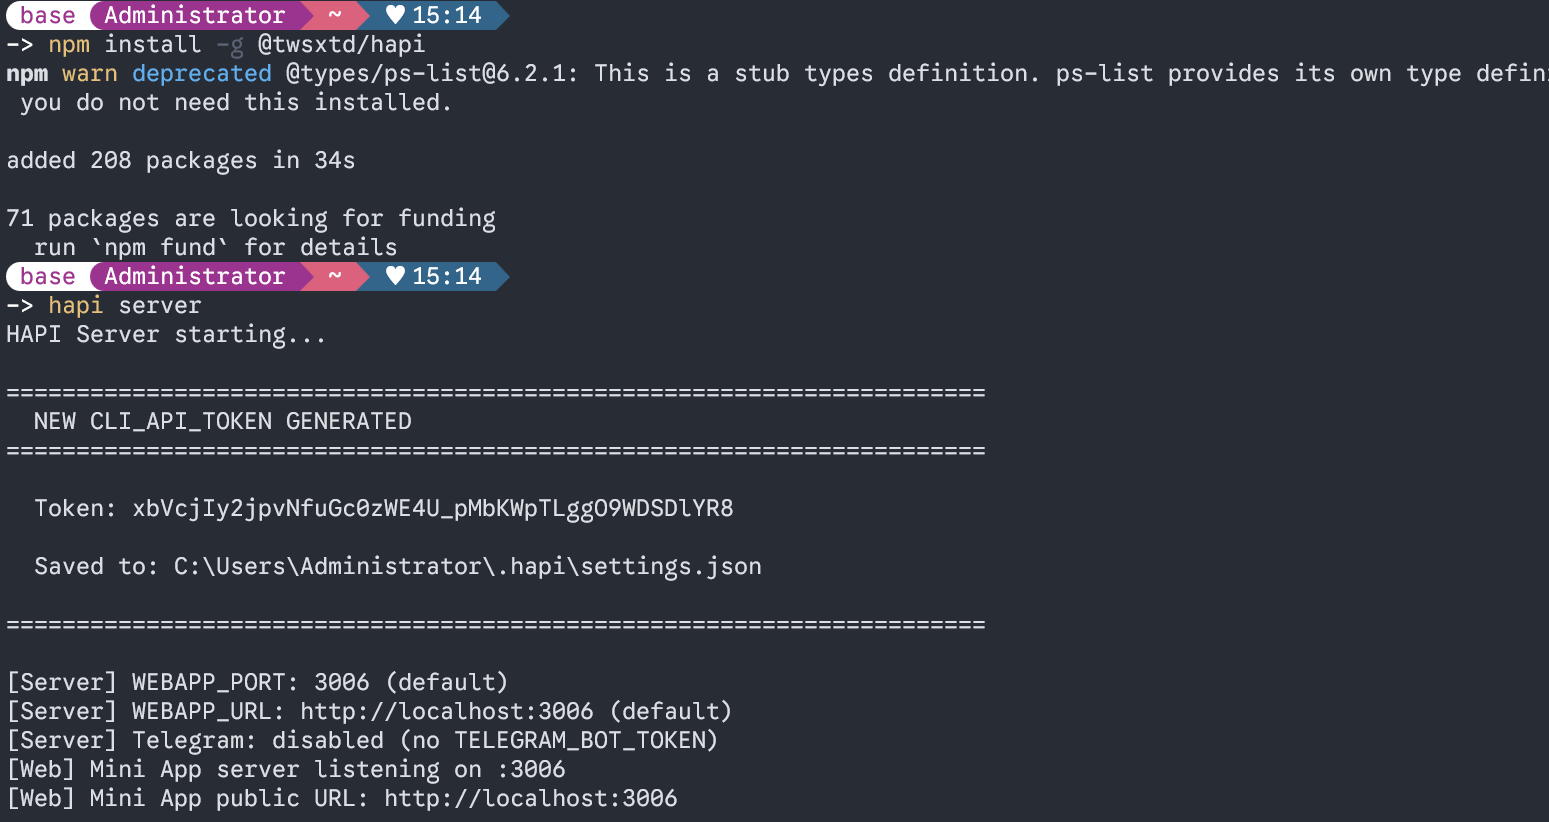
We recommend starting the Hapi server with npx:
npx @twsxtd/hapi serverAfter startup, the Token credential and access URL will be displayed.
⚠️ Important
Save your Token credential carefully! It is the only credential that authenticates and controls your Hapi service.
Step 2: Start an AI Session
In your project directory, run the corresponding command to start the AI service:
Start Claude Code:
hapi claudeStart Codex:
hapi codexStart Gemini:
hapi gemini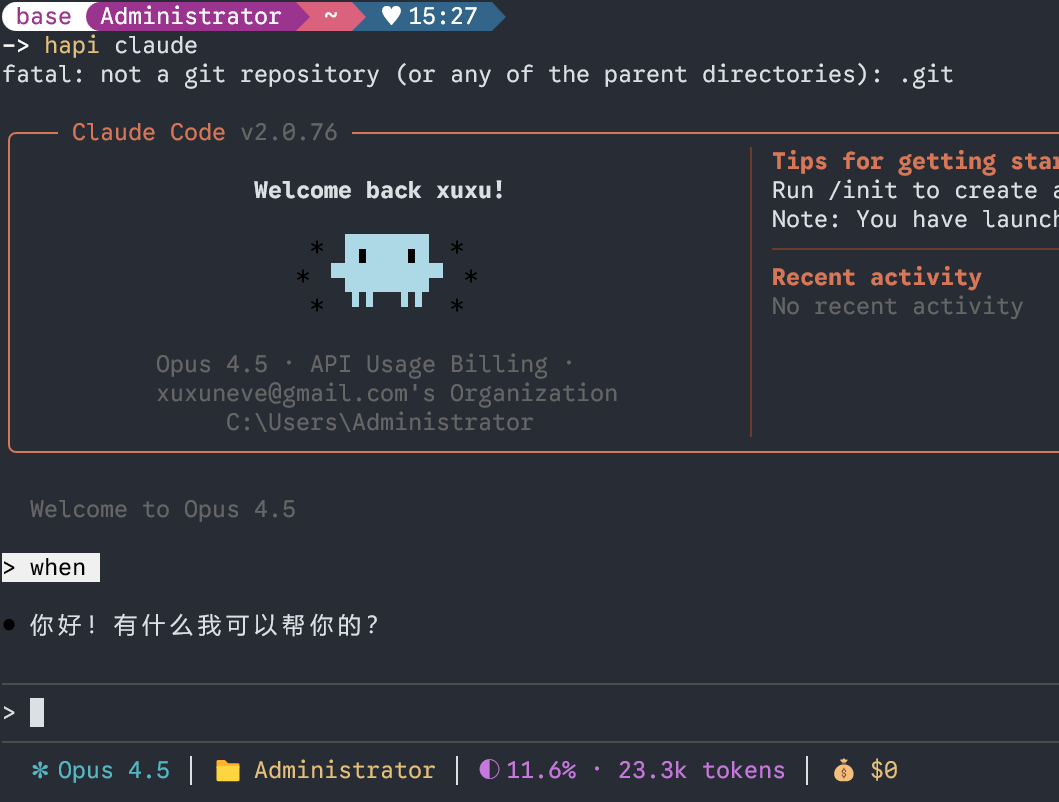
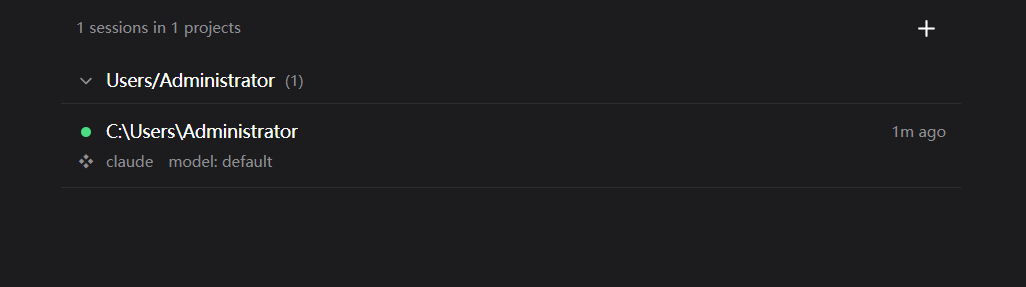
Once running, the front-end UI will show the connection status:
🎉 LAN Access
At this point you can already access and control your AI coding assistant on your local network via http://<server-ip>:3006!
🌐 Configure a Cloudflare Tunnel
To reach your Hapi service from anywhere (including the public internet), use Cloudflare Tunnel for NAT traversal.
Prerequisites
- A domain (any domain will do)
- A Cloudflare account (free tier is sufficient)
Configuration
Follow the Cloudflare Tunnel official docs:
1. Log in to the Cloudflare Zero Trust console
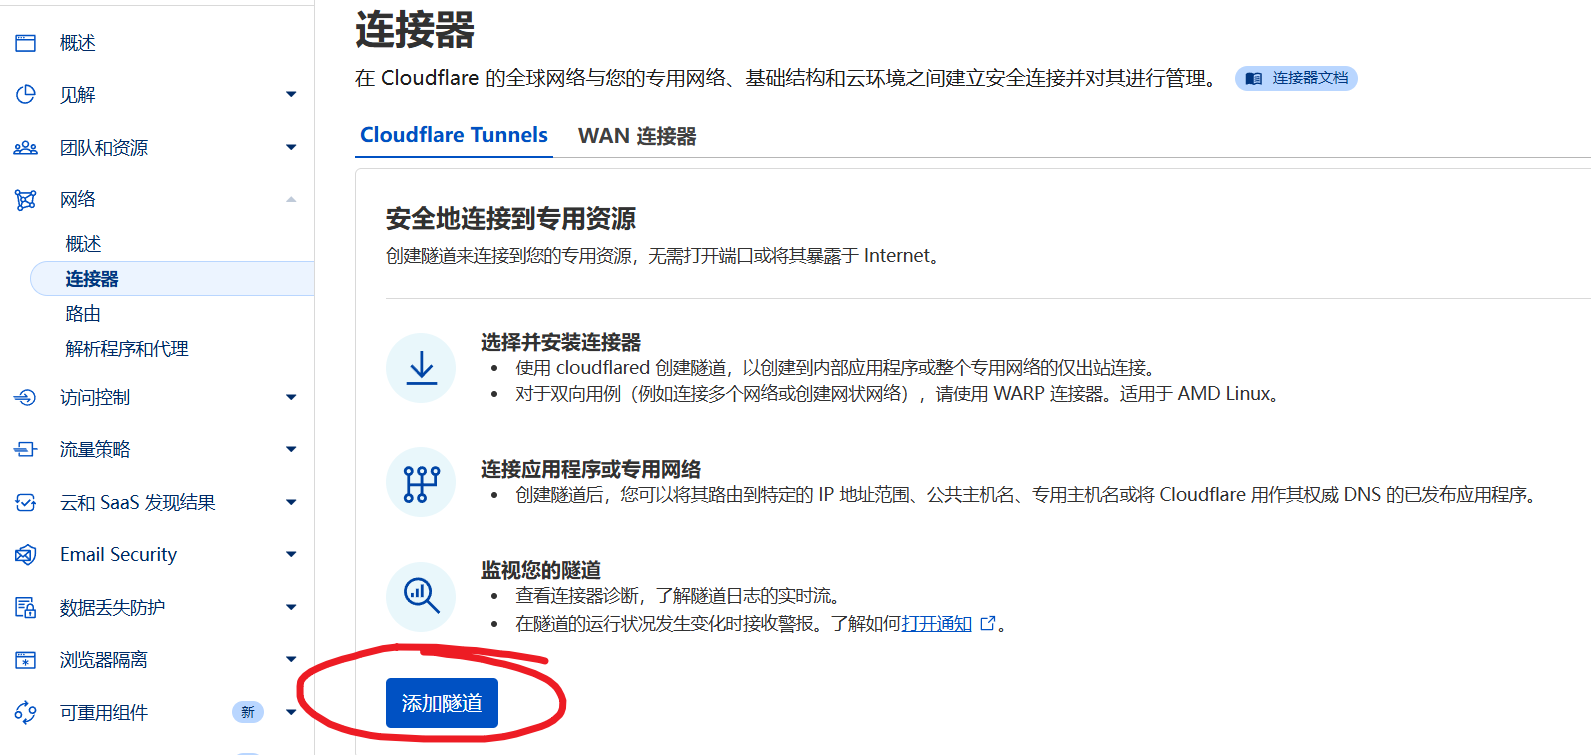
2. Create a new Tunnel
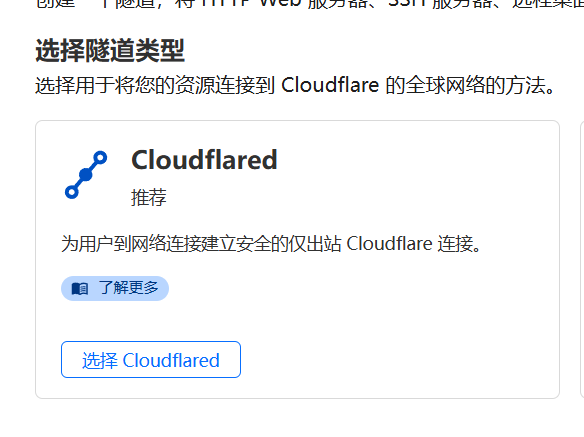
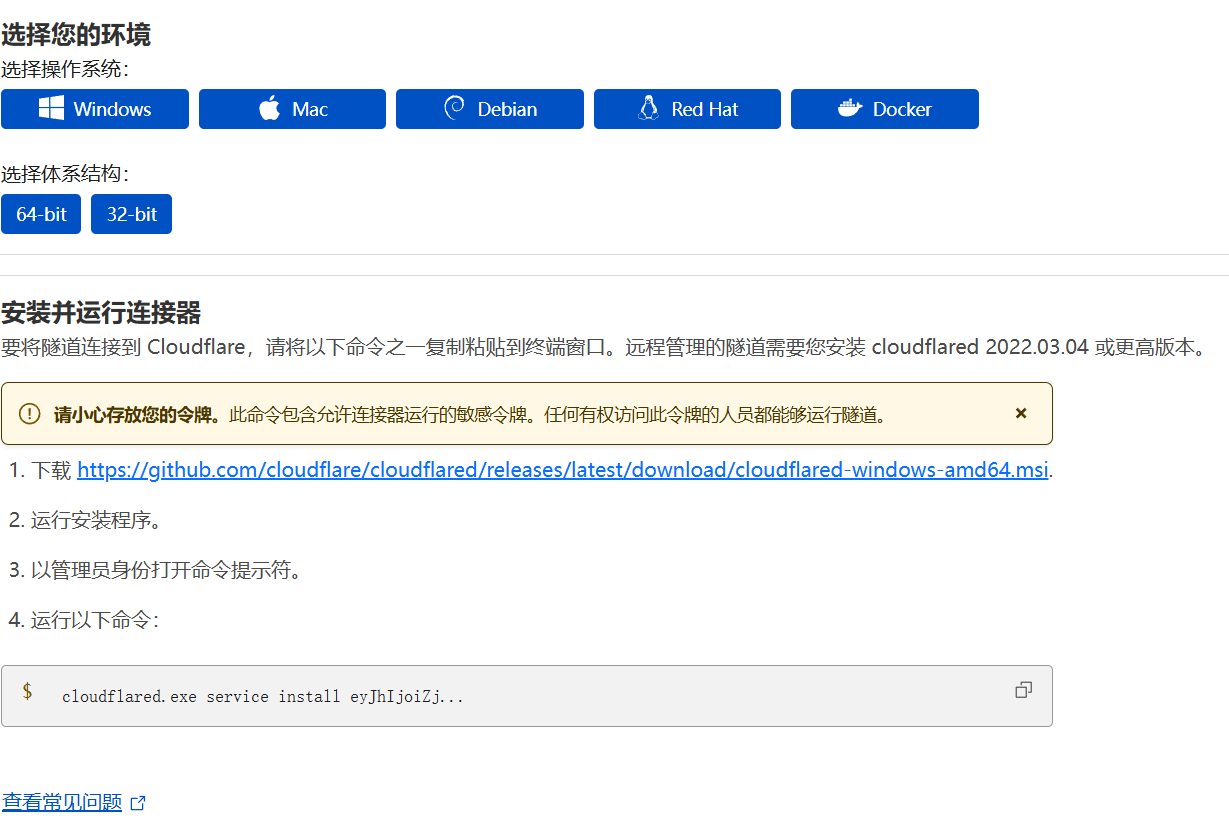
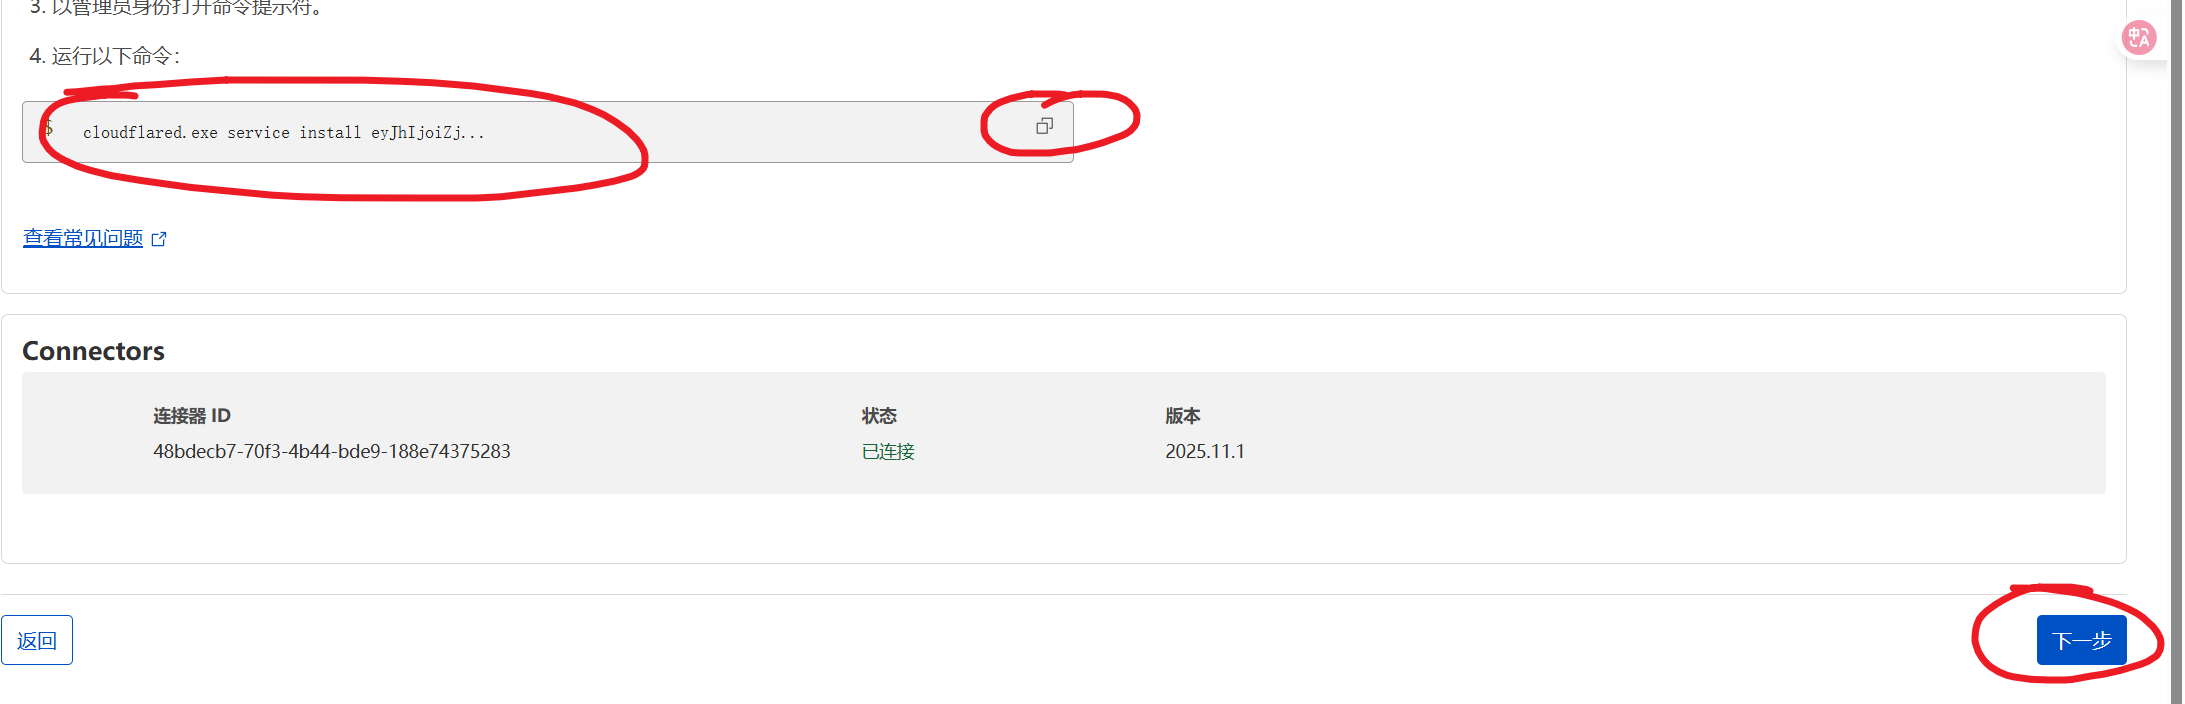
3. Install the cloudflared client

4. Set the tunnel name
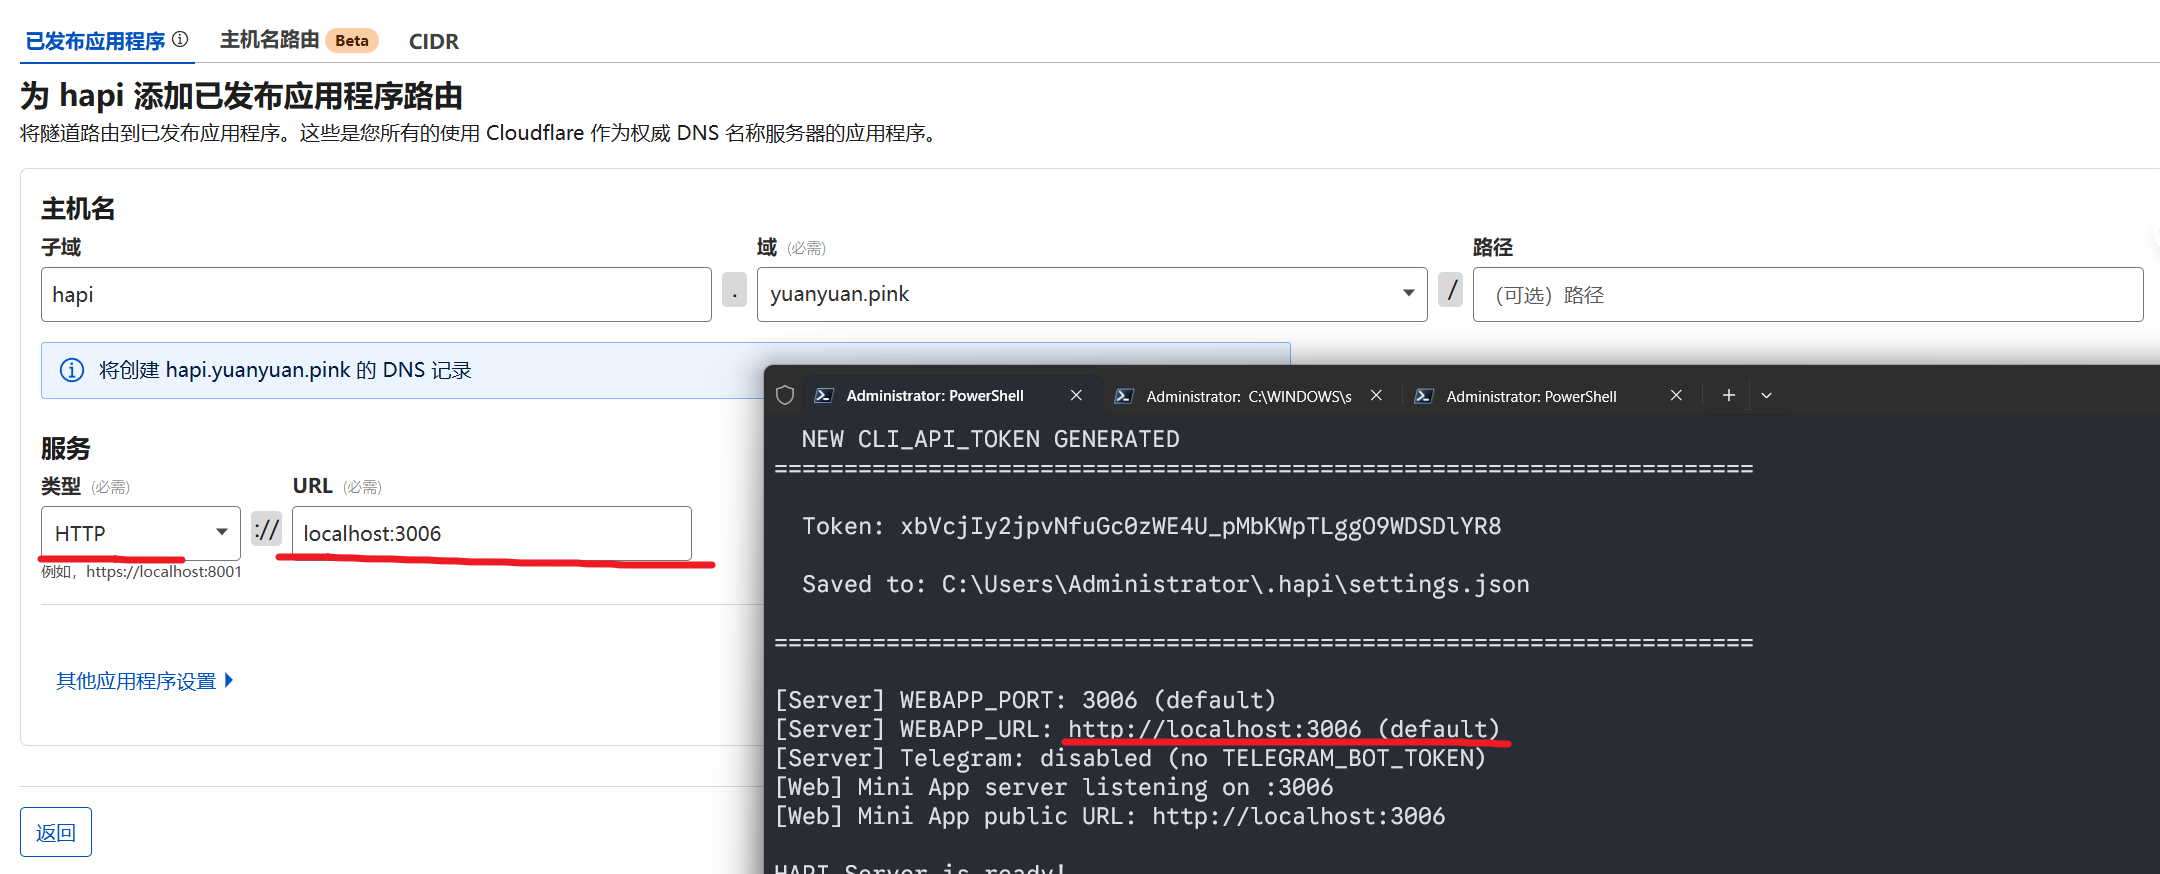
5. Configure the public hostname
6. Set the service address
Set the service address to localhost:3006 (Hapi's default port).
7. Finish setup

✅ Using Hapi
Once configured, you can access Hapi via:
- Local:
http://localhost:3006 - LAN:
http://<server-ip>:3006 - Public:
https://your-domain.com(if you configured Cloudflare Tunnel)
How to use:
- Open the Hapi URL in your browser
- Log in with your Token
- Pick the AI backend to launch (Claude / Codex / Gemini)
- Start remote-controlling your AI coding assistant
💡 Tips
- Open it in your phone's browser to monitor tasks on the go
- Install it as a PWA for a near-native app experience
- Multiple devices can connect and control simultaneously
🔒 Security Recommendations
- Do not share your Token with others
- If exposing it publicly, enable Cloudflare security features (such as Access policies)
- Rotate your Token regularly
- Only use it on trusted networks
FAQ
"Cannot connect to server" error?
- Verify the Hapi service is running
- Make sure your firewall isn't blocking port 3006
- Check that the Token is correct
Cloudflare Tunnel setup fails?
- Confirm the domain has been correctly added to Cloudflare
- Verify cloudflared is installed correctly
- Inspect cloudflared logs to troubleshoot
More questions
Check the FAQ or visit Hapi GitHub Issues.
🚀 Advanced Optimization
If you want to further accelerate Hapi access (especially from mainland China networks), configure Cloudflare optimized IPs:
💡 Speed Optimization
By configuring Cloudflare optimized IPs, you can cut latency from hundreds of milliseconds down to tens, approaching a direct-connect experience.
👉 See the full tutorial: Hapi Advanced: Cloudflare Optimized IP High-Speed Tunneling